
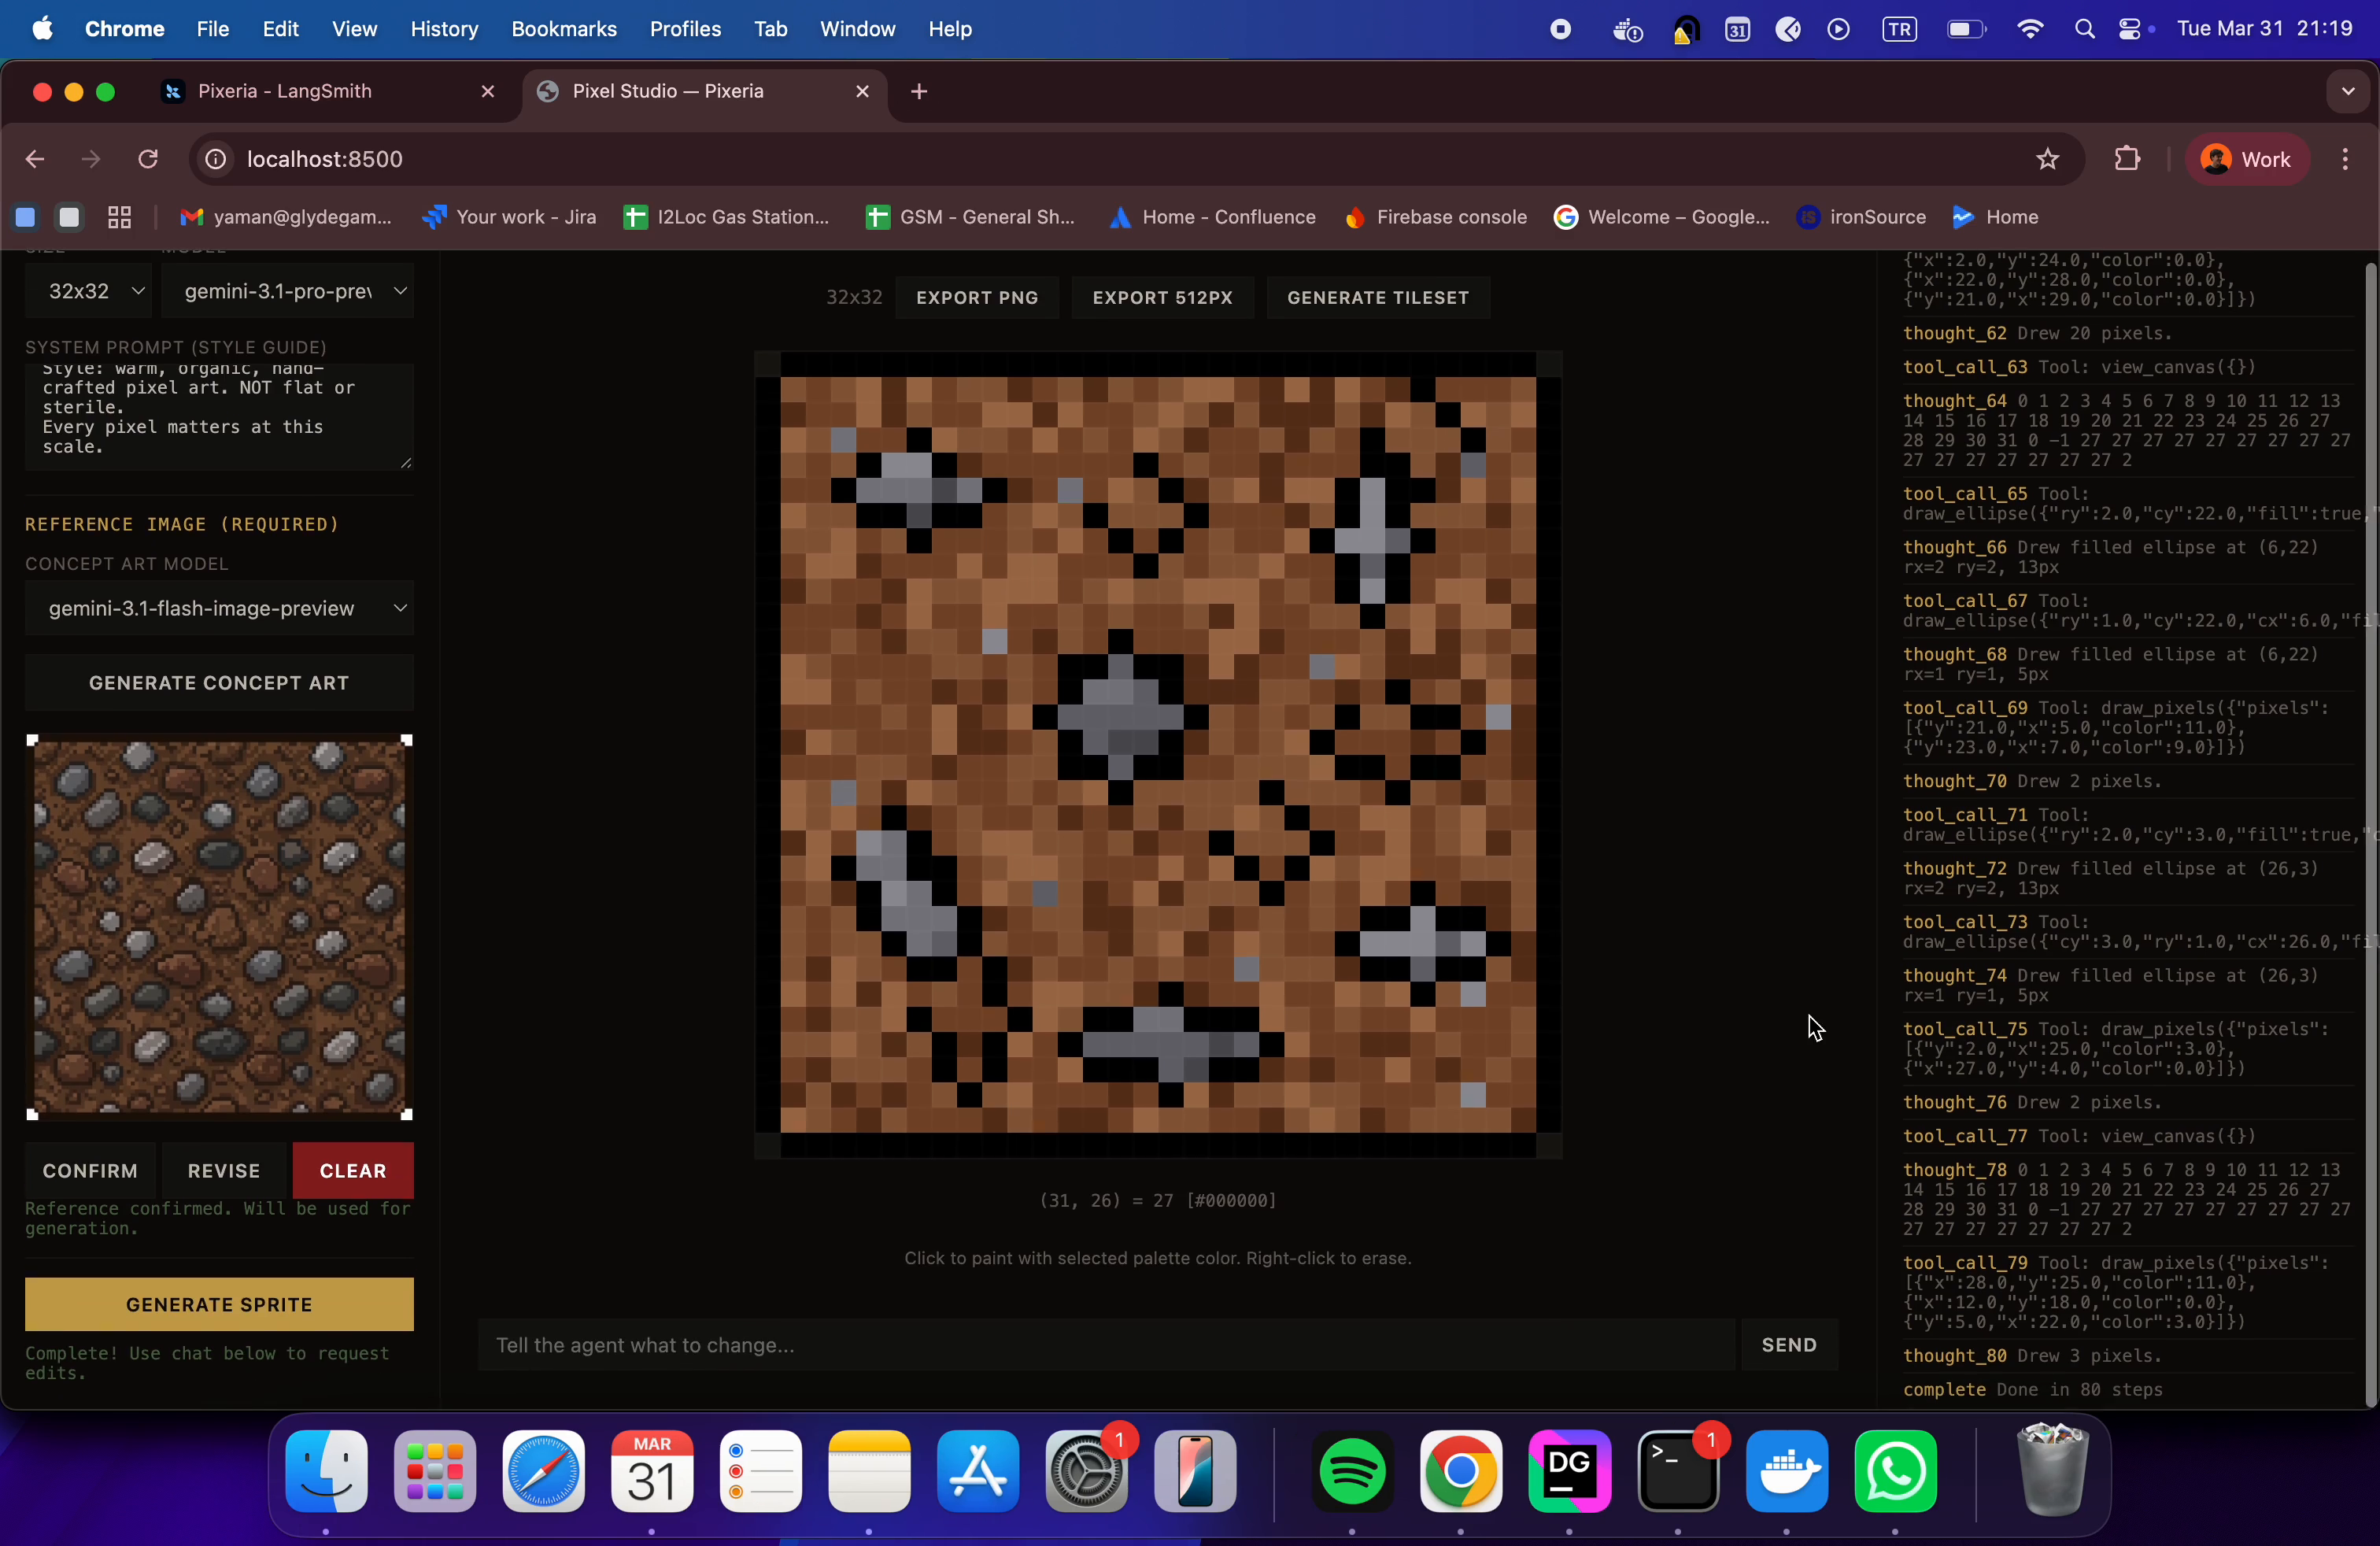
If you need a tileable patch of grass, a transparent item icon, or a game asset with crisp edges, Texel Studio takes a different route from prompting a diffusion model and shrinking its image. An AI agent works on a pixel grid by calling drawing tools, one operation at a time. You can watch the process and ask for targeted changes. That makes it useful for prototypes and assets that need consistent palettes and clean edges, though the result still deserves an in-game review before release. Visit the official Texel Studio GitHub project.
Choose a tile or an item icon first
The project separates assets into Block and Item Icon. Block is for terrain and environment pieces such as grass, walls, stone, and wood; the important question is how its edges meet neighboring tiles. Item Icon is for standalone objects such as potions, keys, mushrooms, and weapons, usually with a transparent background and a readable silhouette. Deciding the purpose first prevents the prompt from asking the agent to guess the size, view, transparency, and tiling rules at once.
A good first exercise is a 32×32 mossy stone tile. Specify one subject, one view, a material, a palette limit, and whether the edges should join. For example: “32×32 square ground tile, top-down view, dark gray stone bricks with sparse bright green moss in the upper left, continuous edges, no more than eight colors, no cast shadow beyond the canvas.” For an item: “Centered 16×16 red potion bottle on transparent background, dark outline, stopper and liquid clearly separated, one-pixel safe margin.”
Install and start the local app
The repository’s quick start is to clone it and run ./start.sh. The manual path creates a Python virtual environment, installs requirements.txt, installs and builds the frontend with Node, and runs python server.py. Then open http://localhost:8500. These commands are written for a Unix-like shell; Windows users can follow them in WSL, as native one-click Windows setup is not documented. To avoid local dependencies, use the link to the Texel Studio hosted version in the README.
Self-hosting requires at least one model provider. For local inference, install Ollama, pull a model listed by the project, and set OLLAMA_MODELS in the root .env. For Gemini, set GEMINI_API_KEY; for OpenAI, set OPENAI_API_KEY. Keep keys in your private local .env and out of public repositories. You can skip the concept-reference stage and paint directly; the README says concept image generation uses Gemini, so local Ollama does not automatically make that stage local too.
A complete pass from prompt to PNG
- Set the canvas and asset type: Choose Block or Item Icon and start at 16×16 or 32×32. A tiny canvas has very little room for details, so avoid asking for many small objects and elaborate texture at once.
- Give visual constraints the agent can act on: Name the subject, view, palette range, material, and whether the background should be transparent or the edges tileable. Describe placement, such as “light from the upper left, shadow toward the lower right,” instead of simply asking for something prettier.
- Review the concept reference: If you use the reference stage, confirm the composition before painting. The reference is guidance, not the final pixel grid. Fix a wrong composition in the prompt before asking for detail work.
- Watch the drawing tools: The agent can place pixels, lines, rectangles, circles, and texture fills. The canvas and event log update as it works. It can inspect the canvas and read an individual pixel value. Look for broken outlines, texture covering the subject, and lighting that contradicts your prompt.
- Make small follow-up edits: Try “darken the right-side shadow by one step, halve the moss, and keep the outer edge continuous.” Change one or two things at a time so you can see side effects. You can also paint by clicking, erase with a right-click, and then ask the agent to continue.
- Export and check at native size: Export the native PNG, a 512-pixel preview, or 16 autotile edge variants from a Block. The larger preview helps presentation; it does not create more pixel detail. Use the native grid and the game engine’s display as the final reference.
Skills that transfer directly to game work
Build terrain: Create stone paths, grass, sand, and brick walls as Blocks. Add the 16 edge variants to a tilemap and lay out a small test area. Check brightness and texture frequency across joins to catch visible seams. Make item icons: Potions, ore, food, and pickups work well when the prompt emphasizes a silhouette and one or two identifying features; tiny lettering and fine engravings rarely survive reduction. Prototype materials: The project lists photo-to-palette pixelization as a job type, useful for quick color studies, though a quantized photo often needs manual cleanup of values and shapes. Keep a consistent art direction: Reuse palettes and set the same canvas size, light direction, outline, and shadow rules across assets.
Common fixes and a final checklist
If the image feels noisy, shorten the prompt, remove secondary ornaments, or increase the canvas. If the edges do not join, make the Block requirement explicit, generate autotile variants, and test them in an actual map. If colors drift, reuse one palette. If an icon is hard to read, inspect its silhouette at 1× instead of relying on an enlarged preview. Before using the PNG, check transparent pixels, isolated specks, the darkest and lightest colors, tile seams, and the engine’s texture filtering. Pixel art is usually scaled with nearest-neighbor filtering to preserve hard edges.
The engine is source-available: the README permits self-hosting, modification, commercial use, and selling generated assets, while stating that it must not be hosted as a competing SaaS. Read the current LICENSE before use. Setup details and features are in the official README.